3D printing architectural models is one of our most favorite things to do, but it comes with a very love hate relationship.
What better way to show off your designs and convey concepts to potential buyers than with a scale model of their potential new structure? Long gone are the days of architects spending countless hours measuring, cutting and gluing materials and components to produce a hand made reconstruction, right? Well.... sort of...

With the current functionality of architectural modelling software it’s now easier than ever to produce realistic high quality rendered images and video walk throughs of designs. But I’m a bit of a floor plan man myself, and if your like me, you will understand the importance of being able to visualise a space in a three dimensional environment instead of on a screen.
The problem with 3D printing in architecture is that ALL of the related modeling software is built to provide 3D information, but only on a 2D platform, and for this reason it does not translate well into the 3D printing environment.
Whats wrong with my CAD model?
There are two main issues that appear when combining architecture models and 3D printing:
1) Firstly when working with a scale model, everything become much, much, much smaller. For example a standard internal wall that is 10cm thick, scaled back to model size then becomes to thin to 3D print with any integrity. Grooves in exterior cladding and brick work patterns, subtle details even at full size, easily become smaller than the eye can see at scale, and are often ignored by 3D printing software.
2) The second and most important issue when working with architecture software is the topic of closed surfaces. Although most architecture software has the ability to export a model in 3d format, it is generally for the purpose of rendering 3d models on screen, and nothing else. To produce rendered images for visualisation, we only need to work with surfaces, and this is just what architecture software provides. However, in order to 3d print a solid piece of geometry, the printing software needs to see a solid closed “water tight” volume.
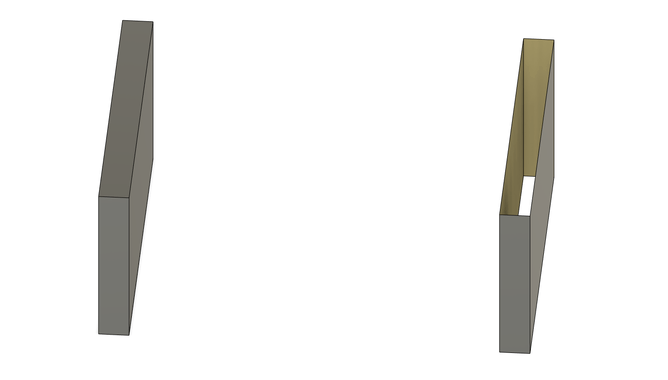
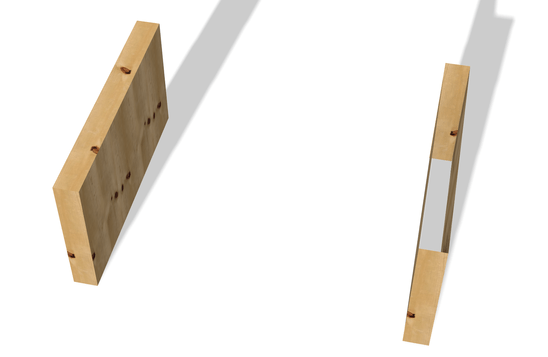
In the example below we have constructed a bare wall, the image on the left is a closed volume comprising of 6 surfaces that forms watertight geometry, and this is whats required in order to make a 3d printable piece of geometry.
By contrast, the image on the right is whats produced by architectural software. Same wall, same dimensions, however it’s missing the top and bottom surfaces to complete a watertight volume. The 3d printing software can see only a rectangular shaped shell with no internal volume to it. As surfaces do not have any thickness to them (they are only a theoretical surface of exactly 0.00mm thick) the 3D printer cannot physically print something that does not exist, so thus it is ignored.
Closed vs Open Surfaces
Both of these models can have colour and texture applied to them (know as rendering) to make for a good looking image, and from a first person view, you cant even tell the difference.
First Person View
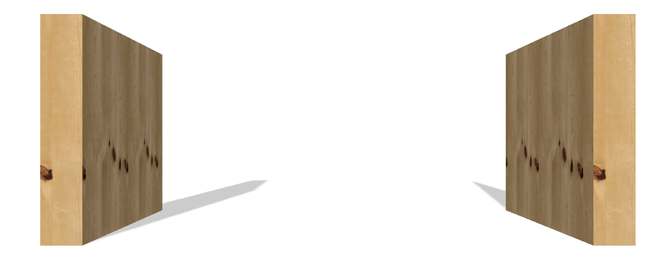
Closed vs Open Surfaces
What have we learned from working with architectural models?
Although there is some overlap of three dimensional elements with architectural design software, it simply has just not been built for 3D printing technology. And while it's totally possible to produce 3d printable models from architectural software, the level of understanding (both in architectural software and 3d printing technology) and time involved in modifying designs to accommodate, is too complex and prohibitive.
There is repair software available that automatically attempts to fix and close off open surfaces, but these programs are designed to repair geometry that otherwise started out closed, but for whatever reason was exported with errors. The architectural surfaces are so haphazard that repair software often cannot determine what needs to be done.
So what do we do?
The best solution is to completely remodel the structure with more printer friendly software using floor plans and elevation drawings as a guide.
There is a bit of a knack to it, you need to understand the capabilities of the specific printing technology to be used, a few design tricks and knowing what tolerances, minimum thicknesses and detail sizes your 3d printing equipment is capable of, and then model all of the building and its features accordingly.
What happened?
So while traditional architecture model making is a lot less common than what it used to be, 3D printing was not the silver bullet that killed it.
Traditional model making can be fairly expensive, often the architect who has drawn the plans is the one who builds the model, and it can takes week to produce by hand. It's a lot less tedious and much quicker to render images made to look like actual buildings, at a fraction of the cost when compared to a hand made model, and this cost saving compromise, is why we see less building models out there.
While its not quite as straightforward as hitting CTRL+P, and miraculously have your model spit out by a 3d printer, when compared to traditional model making it can be a lot simpler than it once was. Depending on model complexity, required scale, and necessary feature details, it can take anywhere from half a day, up to a few days to produce a 3D CAD model ready for printing, quite often the cost of the design work can be equal (and in some cases more) than the cost to have it 3D printed.
As 3D printing becomes more commonplace around the globe, I expect printing functionality will eventually make its way into how architecture software handles its design logic. But it wont be a simple task for developers to implement as it involves changing the core methodology on which the software's are built. For now the only options are to remodel the structure accordingly in entirety, or meticulously edit and repair the original model to suite, both of which require a uncommon yet very specific knowledge base in order to do so. If you ask me, when given the opportunity to redraw a model from scratch, we are able to achieve fantastic results!
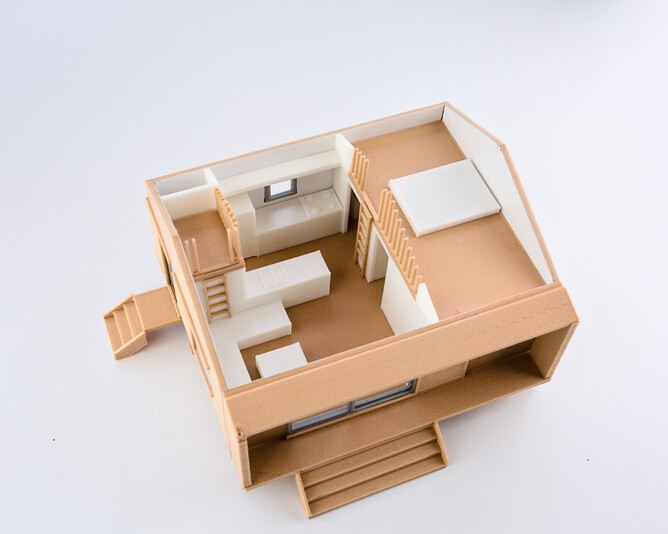
File Provided - Revit 3D Model
Design Time - 20 Hours
Print Time - 100+ Hours
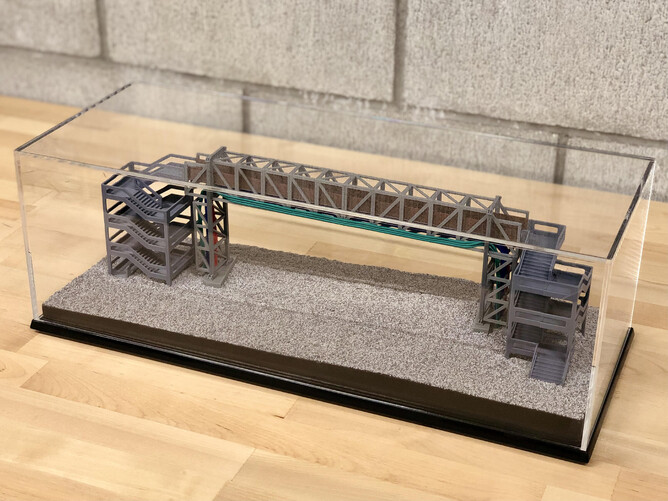
File Provided - STL Export from Unknown Design Software.
Design Time - File Provided, +6 Hours Clean Up.
Print Time - 100+ Hours
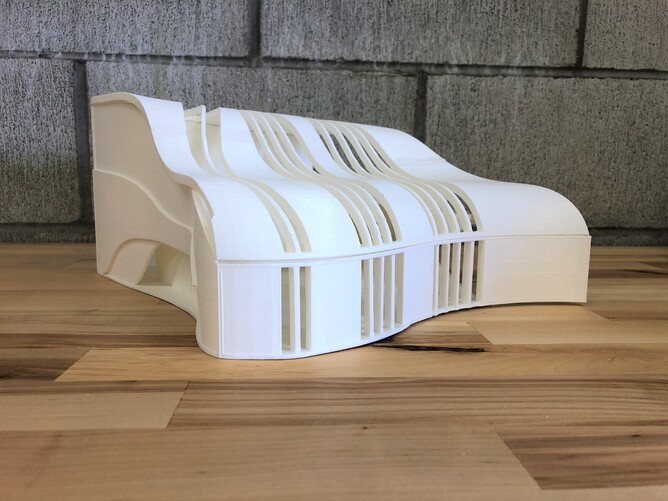
File Provided - STL Export from Unknown Design Software
Design Time - File Provided, No Clean Up
Print Time - 60 Hours

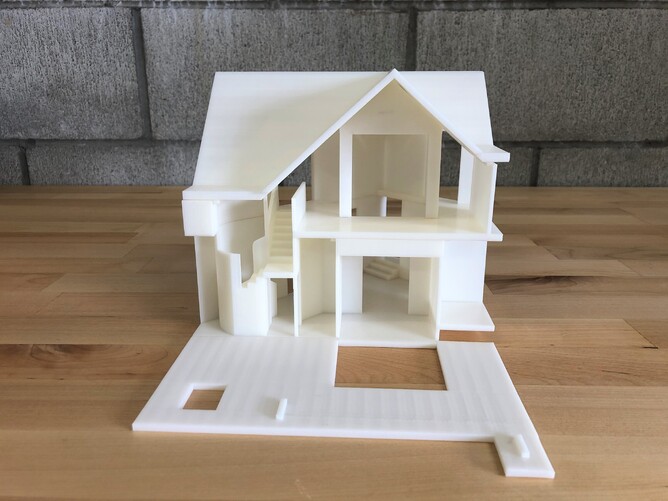
File Provided - 2D Floor Plans and Elevation PDF's
Design Time - 6 Hours
Print Time - 35 Hours